![]()
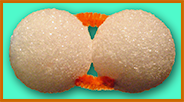
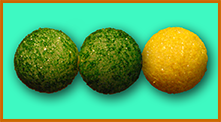
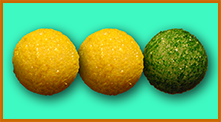
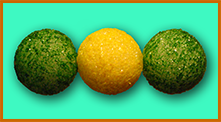
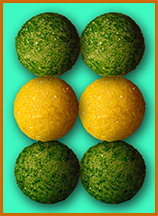
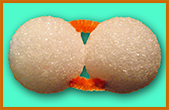
Make Atoms!
Different atoms can easily be distinguished by using styrofoam spheres of various sizes and colors. Some handy tips can help avoid making a mess during the coloring process. Magic markers work well (with patience) but are hard to keep off your fingertips, so use a plastic bag to grab the sphere, and use as a "glove" to protect your fingertips from staining. The styrofoam spheres may also be painted with non-toxic poster colors.
![]()
![]()
Making Model Molecules
Hands-on molecule modelling uses multiple senses (visualization, tactile, auditory) to explore and reinforce the concepts. Here are some tips and shortcuts to make the process easier and less messy.
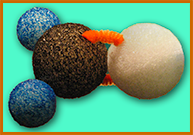
The atoms can be gumdrops, marshmallows (some dyed with food coloring), puffed cheeseballs, etc., but styrofoam balls are the best:
- uniform size and sphericality
- different colors available
- relatively durable
- class not tempted to eat them
- storage doesn't attract pests
- easy to color with Magic Markers—tip: hold with a plastic bag as glove to keep fingers clean
Bonds can be toothpicks (easier to stick in) or pipecleaners (more bendable), or both chosen appropriately for the type of bond represented. It's possible to ignore double bonds for less advanced explorations (just use one toothpick even for double bonds); a good representation of multiple bonds is as shown below for O2 and CO2.
![]()
![]()
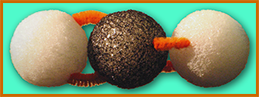
![]() O2 (diatomic oxygen)
O2 (diatomic oxygen)![]() CO2 (carbon dioxide)
CO2 (carbon dioxide)
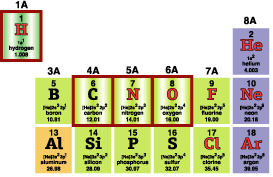
Zooming in on H, C, N, O in the Periodic Table (oultined in red, to the right), shows another handy pattern—the column indicates how many atomic bonds can usually be formed. C forms 4, N (usually) forms 3, O forms 2, H forms 1 (and He, Ne, and the others in the last column form 0).
This rule is shown by combinations of H with C, N, O:
![]()
C, N, and O can also join with each other. The actual molecule shapes depend on accurate
modelling of bonds.
![]()
![]()
Modelling Salt (NaCl)
Salt is an essential ingredient of an estuary. Basic science ideas about salts (especially NaCl) can effectively be explored by hands-on modelling of crystals of NaCl (table salt). These activities use multiple senses to encode information, and are fun, and conceptually simple.
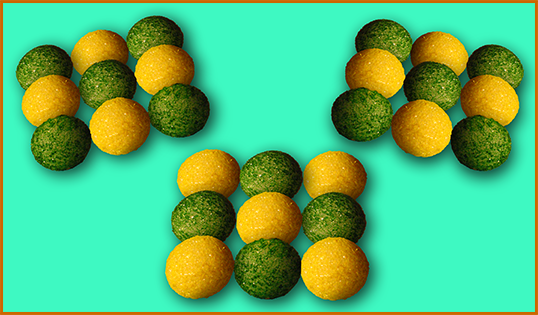
Forming a crystal
Imagine a solution of NaCl, as the H2O evaporates. With less and less water present, the Na+ and Cl- ions come closer and closer together. Opposites attract, likes repel, so which of the following will (will not) happen?
![]()
Either of these possible?
![]()
Either of these possible?
As the (possible) trios above crowd together, which of the following will happen?
 OR
OR 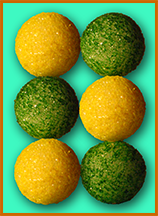 OR
OR 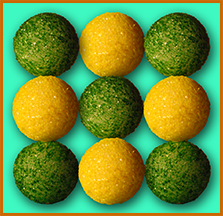 ?
?
More water evaporates, more Na's and Cl's stick together:
Yet even more water leaves, and these larger clumps stick to each other...
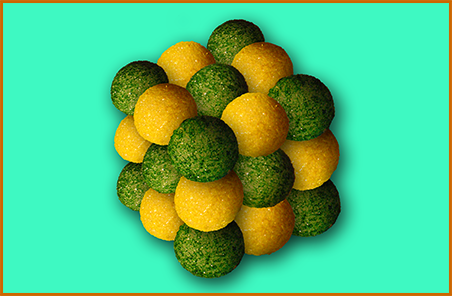
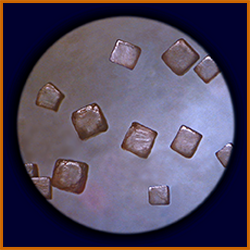
producing crystals of characteristic shape (as seen through a microscope).
![]()
Hands-on Solutions
A combination of simple observations and hands-on modelling can make crystal-clear the the theory of how salt (and other substances) disappear when dissolved in water. The modelling can also lead to testable predictions, thereby illustrating the Scientific Method in action.
Materials
- PAPER and PENCIL! (recording observations and results is VERY IMPORTANT!)
- table salt NaCl (check beforehand that its crystals are visibly cubic)
- water
- clear plastic glasses and glass beakers (for hot water)
- sugar cubes
- plastic containers
- beebees
- hotpot or other means of heating water
- eyedropper
- microscope and slide
Procedures
- Start with a close-up examination of crystals from an ordinary salt shaker. The shape should be clear even without a magnifying glass or microscope—draw what you see, and write a written description (even just a few words "NaCl crystals are tiny cubes"). If possible, have microscopes available for a closer look.
- If microscopes are available (or a single microscope with a TV projection that everyone can see at once), focus on NaCl crystals, then use an eyedropper to add a drop of water, and watch patiently, writing a description of what happens (corners go first, edges next, cubes become more and more rounded).
- To examine the possible cause of this phenomenon, put a sugar cube in a tupperware container with a few beebees, and shake a bit, then examine.
- Hypothesize a process on the atomic level that explains the observations just made.
- Now make (or take existing) models of salt crystals, and of water molecules, and perform a "puppet show" showing how the impact of H2O on NaCl breaks it apart, emphasizing the difference (speed of motion) between cold and hot water.
-
Test the prediction: put equal amounts of NaCl (best: weighed out, but measuringspoons will do) in 2 identical glass beakers, then add equal amounts of water (hot in one, cold in the other), and watch to see which dissolves first. If a microscope is available, repeat the microscopic examination of the dissolving of NaCl, once with hot water, again with cold.
![]()
![]()
A "Solution" to the Mystery of the Disappearing Salt
The disappearance of salts when water is added is a Mystery! "Why does this happen?"—figure out Nature's magic tricks.
- Prod class to come up with descriptions of what actually happens when solids dissolve—breaking apart into tiny pieces too small to see ("atoms" and "molecules").
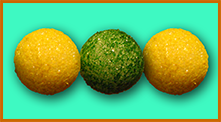
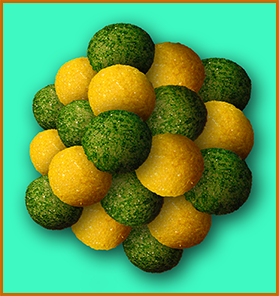
- Then start them on a modelling activity, using styrofoam spheres to represent atoms of Na, Cl, H, and O.
Materials
- paper and pencils/pens (don't proceed til everyone ready to record!)
- cups, NaCl, water
- styrofoam spheres of different colors and sizes: small—Na (yellow), Cl (green), H (blue); large—O (white); (you can assign whatever colors are easiest for you)
- toothpicks to join atoms together
- NaCl (N.B. kosher best for dissolving, Morton or other generic best for cubic crystal shape), other salts
- 2 beakers
- hotpot
- water (a pint will do)
- (optional, if available) camera, TV, microscope (to show whole class at once the shapes of NaCl crystals)
Procedure
- Groups observe carefully as salt dissolves, asking questions (get them to list questions in advance).
- Get discussion going about how water dissolves things, and names of smallest pieces formed ("atoms", "molecules").
- Ask for descriptions of students' experiences with magnets—get them to come up with "opposites attract, likes repel".
- Distribute materials for molecule modelling—each student gets (at least) 1 Na or 1 Cl, maybe each table gets 1 O and 2 H's.
- Stage a "puppet show" of atomic interactions to assemble a crystal of NaCl, and have class put all their atoms together.
- Hold up your own model of assembled crystal, then "puppet show" of water molecule breaking it apart.
- Introduce ideas of energy, motion, heat, with more of "puppet show".
- Make sure students write down and/or draw basic ideas (e.g. magnets), and draw what they've made (NaCl crystals, H2O molecules).
Anlysis and Discussion
We have now done two steps of a good "mystery-solving" procedure:
- observe (in detail! RECORDED in words, numbers, and drawings—also photos)
- made a guess about how it happens—"atomic" theory of materials, and "kinetic" theory of heat—explains NaCl shape, and disappearance
We've also fixed the ideas in our minds by making "models" representing these hypotheses. Now time for the next steps:
- make predictions based on our hypotheses
- test those predictions
Have class use logic & common sense to predict whether cold or hot water will dissolve some salt faster—refer back to "puppet show" modelling done earlier. Then do a test with equal amounts of salt in 2 beakers, and equal amounts of water, one hot and one cold. RECORD OBSERVATIONS! Also record steps of "scientific method". Finally, talk about other predictions of atomic/kinetic hypotheses, (e.g. melting, boiling, expansion and contraction, gasses dissolving in water; enact with groups of students (if time & discipline level permit).
Take some of the salt water produced in the demo, and put it on an evaporating tray for examination next time—we'll look at crystal shape.
![]()
![]()
Measure!
What is a measurement? It's an observation that's expressed in numbers. The simplest example is a count of something—e.g. how many fish in a tank, how many students got A's? More complicated measurements involve comparisons, using measuring tools (rulers, thermometers, scales, clocks, etc.). Numerical observations are very important because arithmetic can be used to understand the relationships between different measured quantities. This Web page has the first of several hands-on activities using measurement to deepen understanding and accomplish useful things.
How Much H2O?
The aim of this activity is to predict the amount of water needed to fill an aquarium, then actually measure out the predicted amount and see if it's correct. The prediction is based on the following:
- linear measurement of the tank dimensions, in English and metric units
- calculations to determine the volume
- unit conversions to relate volume (cubic inches, cubic centimeters) to liquid measure (pints, quarts, gallons, liters)
Doing this activity will provide a direct comparison between working with the English system vs. the metric system. It will also provide practice in:
- making measurements
- recording data in words, numbers, and sketches
- relating different measurements to each other
- testing a prediction by performing an experiment (a component step of the scientific method)
Materials
- ruler with inches and centimeter/millimeter scales
- metric graduated cylinders (in cc and/or ml), and English-system measuring cups (ounces, cups, pints, quarts)
- fish tank to be (partially) filled
- piece(s) of tape to mark the level to fill to
- calculator (optional—can do math by hand!)
Procedure
- use a piece of tape on the side of the tank to mark how high to fill it—make the long edge of the tape as horizontal as possible
- sketch the tank to be partly filled, including the line to fill to
- label the sketch with L for length, W for width, and H for height
- record the measurements IN WRITING(!), in inches and cm
- calculate volume in cubic inches and cc: V = LxWxH
- convert volume (in cubic units) into liquid measure (liters, quarts; 1 qt = 57.8 cubic inches or so)
- measure the liquid amount calculated in the previous step, and put it into the empty tank—does it fill the tank to the desired level?
![]()
![]()
Float It!
One simple hands-on experiment is floating a potato.
A more quantitative, measurement-oriented version is using a hydrometer to test and measure salinity. Advanced classes can make various solutions of known density (by carefully measuring weight and volume), test with the hydrometer, then mix solutions of different concentrations and predict, then test, what densities result.
Connections can be made to the engineering of boat design—Plimsoll marks on the sides showing load lines, with variations for different densities of water (warm vs. cold, fresh vs. salt)—now you can understand the underlying concepts and importance.
![]()
![]()
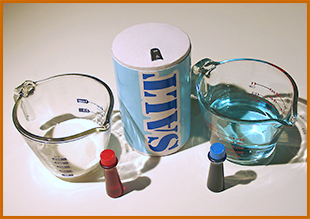
So What is this Salt Wedge, anyway?
In estuaries, salt water meets fresh water. Let's make a miniature estuary and study what happens!
Our study will be scientific—we'll make and record careful observations, try to explain what we see, use our explanations to predict what else might happen, then test our predictions. TEACHERS: practice this before having your students try—it takes patience to get really good results, but it's worth it!
Materials
We'll need:
- salt (NaCl)—the cheapest kind often has the best crystals!
- water
- food coloring
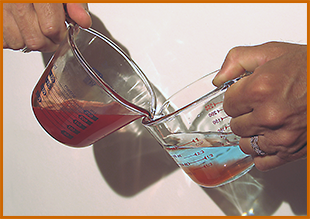
- 2 measuring cups, or 2 clear plastic glasses
- PENCIL and PAPER!! (recording is important!!)
- optional magnifying glass or microscope
- paper towels in case of a spill
Procedure
- fill one glass or measuring cup about 2/3 way with water
- put NaCl in the other glass or cup, approximately 1/8 full or so
- take a pinch of the salt, look at it closely (microscope helps!)
- record your observations (sketch and/or verbal description)
- add water to the salt, about 1/4 glass, stir/slosh till dissolved—it's OK if some salt remains.
- Describe what happens
- If you have a microscope (40x is good), put a drop of water on some salt grains and watch patiently under the scope—describe!
- add some food coloring to make the very salty water dark
- very gently pour the salty water into the fresh water (it helps to tilt the fresh water glass to slow the pouring)
- observe and record the results!
We've got some explaining to do!
At least 3 good questions should come from your observations:
- Why are the NaCl crystals shaped like cubes?
- How did the salt disappear when water was added?
- Why does the salty water go to the bottom?
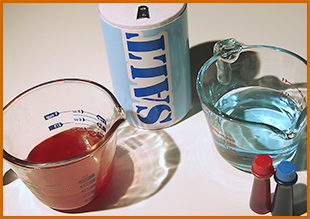
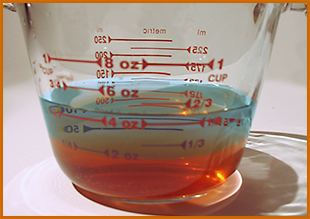
When ocean water comes into an estuary with the tide, it tends to settle to the bottom—just like our model. As it pushes its way in, it usually gets a wedge shape—hence the title of this Web Site!
![]()
![]()
What is a Fire?
This activity models the burning of various fuels (coal, natural gas, and hydrogen gas), using styrofoam spheres of various sizes and colors to represent the atoms involved. Concepts illustrated include:
- fires need oxygen as well as a fuel
- in a chemical reaction, atoms don't disappear, or appear out of nowhere, or change into different kinds of atoms
- how chemical notation provides "accounting" for atoms in a reaction, and in a molecule
- burning produces "waste products" ("exhaust fumes")—most commonly CO2 and H2O
- burning releases energy that was stored in the fuel (as chemical energy), converting it into light and heat
- (optional, for higher grade levels) atoms bond together in several ways—e.g. single and double bonds
- (optional, for Web page record of activity) digital camera—take pictures of atoms and molecules at all stages of activity
Materials
For each participating student, or group of students:
- paper and pen (or pencil)—recording is important!
- 1 C (large black styrofoam ball)
- 4 H's (small blue styrofoam balls)
- 4 O's (large white styrofoam balls)
- 4 toothpicks and 4 toothpick-sized pipecleaner segments for atomic bonds; replace the pipecleaners with 2
- more toothpicks if double bonding not represented
- (optional) digital camera to record and webify the activity
Procedure
-
Form groups, distribute materials, and explain the process of making molecules (at a grade-appropriate level—e.g. double bonds and tetrahedral molecules are advanced concepts, optional for lower grades). For more details, refer to these handy tips and assembly instructions).
- Have each group assemble from their atoms and bonds 2 H2 and 3 O2 molecules (double bonds at teacher's discretion). They should write a description of their procedure, including an inventory of materials used, and drawings of the molecules produced (see pictures). Have them relate the picture and model to the chemical formula.
- Start with the simplest combustion - C + O2 -> CO2; have the students "act it out" with the C and one O2 molecule. They should record in writing the chemical equation, and ponder its connection to the manipulation of the models; drawing is also good.
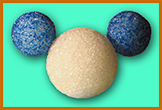
- Next, "burn" the 2 H2 molecules with the remaining O2 molecule, to produce 2 water molecules; record as above. Shape of H2O should be described grade-appropriately (ranging from "like Mickey Mouse" to "tetrahedral bonding").
- Now assemble one CH4 and 2 O2 molecules to match the pictures. Using the experiences above, enact and write out a chemical equation for the combustion of methane. In Nature, and particularly in estuaries, methane (also known as "swamp gas") is produced and can burn spontaneously.
- A very important form of "burning fuel" is necessary for all living things. Respiration uses food as fuel (e.g. sugar), and oxygen (inhaled by lungs or gills) to burn it, releasing energy.
![]()
![]()
Ecocycles—Photosynthesis and Respiration
This activity gives students (and/or teachers!) an opportunity to realize visually and tactilely the molecular processes involved in photosynthesis and respiration.
Materials
1. styrofoam sphere atoms: (suggested colors—change if necessary)
- 1 C (large black)
- 2 H (small blue)
- 3 O (large white)
2. Chemical Bond Materials
- 2 toothpicks
- 4 pipecleaner segments about 2" (or 2 more toothpicks if double bonds not considered)
3. Optional Materials
- (optional, but highly recommended) 1" square or so slips of yellow paper with small holes in the center, to represent solar energy ("energy token")
- (optional, but highly recommended) a yellow, a green, and a red (or pink) slip of paper: yellow for Sun, green for Plant, red for Animal
- pencil and paper—as usual, recording is important!
- (optional) digital camera to webify the activity
Procedure
The class breaks up into groups (3 students per group is ideal), and each group receives a materials set as listed above. The students pick a colored slip to choose their (initial) role. Students start their datasheets with an inventory of materials. Then each group uses the materials to assemble the "input" molecules that plants (and algae and other chlorophyll-bearing organisms) use in photosynthesis, i.e. CO2 and H2O. Written descriptions and drawings should be recorded on the datasheets, as well as chemical formulas for the molecules.
The student representing the Sun gives one of the small, holed yellow paper slips to the student representing the Plant. This energy enables the Plant to disassemble the molecules H2O and CO2, then reassemble the atoms into "carbohydrate" CH2O and oxygen O2; the yellow "energy token" should be skewered on one of the carbohydrate's bonds (C-H toothpick is easiest). All should ponder the fact that the process could not happen without the solar energy—energy is like the "money" of an ecosystem, and nothing can happen if there is none.
Plant now gives Animal (student with red/pink paper slip) the carbohydrate (food to eat) and O2 (air to breathe); Animal (and all others) should ponder the eating, digestion, and breathing processes as Animal "digests" the carbohydrate by breaking it apart, and recombining it with the oxygen atoms to return to water and carbon dioxide (products of burning). Respiration is a type of burning. The "energy token" is freed and Animal keeps it separate from the new molecules—it represents energy liberated by respiration, and available for Animal to use for other activities. Animal hands the H2O and CO2 back to Plant, who can then repeat the process if Sun gives another energy token. Repeat the cycle as many times as there are energy tokens... Students can rotate roles if time permits. Multiple repetitions underscore the cyclic nature of the processes in an ecosystem. The reuse of the same atoms, but new energy tokens, relates directly to how a closed mini-aquarium can survive on just sunlight.
![]()
![]()
The Molecules of Photosynthesis & Respiration
Water H2O Carbon dioxide CO2
Photosynthesis
Plants, algae, and other living things containing chlorophyll can capture the energy of Sunlight and use it to tear apart and rearrange these two molecules (water, H2O + carbon dioxide CO2), in a process called "photosynthesis" (literally means "making with light").
After rearrangement, two new molecules are formed (using the very same atoms present originally: 3 O's (oxygen), one C (carbon), and 2 H's (hydrogen). One of the new molecules contains carbon, and H and O in the proportions of 2 H's to every O (like water, or "hydrate"), so it's called "carbohydrate". Examples are various types of sugar, starch, cellulose (in wood), and (shown below) formaldehyde, the simplest example.
Here it is as a chemical equation: H2O + CO2 + light energy -> CH2O + O2 (with the energy stored in the sugar)
Carbohydrate CH2O Diatomic oxygen O2
Some of the energy captured from the Sun is stored in the carbohydrate, making it a type of fuel. Like other fuels e.g. methane, natural gas in a kitchen stove, the energy can be released again by burning. In living things, this burning process is called respiration.
Respiration
Living things need energy to live (and all the processes associated with living: growing, digesting, moving,...). Where does this energy come from? It's stored in FOOD—a type of fuel, adsorbed by eating and digestion. How is the energy gotten out of the food/fuel? By burning it. Oxygen needed is obtained by breathing (air for land creatures, or from oxygen dissolved in water for water creatures). The oxygen and food combine in the cells of the body just as CH4 burns in a stove flame. The rearrangement of atoms is exactly the reverse of photosynthesis—CH2O + O2 -> H2O + CO2.
Practice these concepts in class with a hands-on activity, and observe them in action in mini-aquariums.
H2O (water)
CO2 (carbon dioxide)
CH2O (Carbohydrate)
O2 (diatomic oxygen)
![]()
![]()
Making Mini-Aquariums
This activity sets up living aquaria which (if all goes well) will illustrate how an ecosystem constantly reuses the same materials (atoms), but does need something from outside—namely energy from the Sun.
Materials
- clear plastic salad bar containers
- brine shrimp (sold live at PetLand and other pet stores)
- algae (seaweed—from beach, or aquarium store)
- salts: NaCl, (and optionally, MgSO4)
- water
- (if available) microscope, perhaps camera and TV
Procedure
This activity starts with a close (even microscopic) examination of the various components of an ecosystem, then puts them all together into a mini-estuary for long-term study and care—naturally leading to feelings of protective fostering.
To start, provide (e.g. on pieces of paper) samples of NaCl crystals and artemia eggs, for naked-eye examination—see how tiny they are (especially the eggs, like dust). Then, if possible, show under the microscope (on TV if available, to share the view efficiently).
![]()
![]()
Salty Chalk Soda
This activity will study CO2 and carbonates (salts containing CO2), with an emphasis on how living things produce and use them.
Materials:
Chemicals:
- water H2O—distilled is best
- vinegar—acetic acid
- "sidewalk salt" of a specific kind—calcium chloride CaCl2
- baking soda—sodium bicarbonate NaHCO3
- chalk, seashells, limestone, coral,...various natural forms of calcium carbonate CaCO3
- table salt—sodium chloride NaCl (kosher salt dissolves best, but cheap salt has
best crystal shapes) - seltzer—carbonic acid H2CO3 = H2O + CO2
Equipment:
- paper, pencils/pens, etc. for WRITING DOWN OBSERVATIONS
- bottle for water porting and waste liquid collection (Note: safe to dispose down drain)
- 3–4 medium (8 oz) clear plastic glasses
- plastic shot glass for each student
- paper towels
- masking tape for labels on shotglasses
- (optional, if available) digital camera and TV to attach it to
Students will do for themselves a "magic trick" (which the teacher can first perform in front of the class)—"making chalk appear from nowhere". We'll then study the chalk by testing it with acid (vinegar), and compare its reactions to other common substances, especially some made by living things in the ocean (e.g. chalk!).
Step-by-step procedure for the "experiment":
- Safety speech: keep away from eyes, faces, mouths, don't splash, no throwing around, especially at each other, NO TASTING!!
- Put bottle of water in view of class, commenting on "main ingredient of ocean".
- Distribute shotglasses among class; have paper towels handy; get students to prepare lab sheets for notes and drawings.
- Put some CaCl2 in one glass, some NaHCO3 in another.
- Add water, stir until dissolved, and discuss how its disappearance is a mystery we've solved earlier...
- Half of students in each group put a small piece of tape on their shotglass, as CaCl2 label.
- Give each student 1/2 shot of appropriate solution.
- Have pair of students (with different solutions) mix into UNLABELED shotglasses, observe what happens; let stand a while; write down procedure followed; everything observed; draw if inspired.
- While precipitate is settling, distribute chalk, rocks and shells; pick a shell (for TV/cameras display, if available); have all try to draw it.
- Ask if anyone knows what will happen if vinegar is added to baking soda? (Bet most do!). Demonstrate to class.
- Have them carefully decant leftover water in chalk glass into extra vessel, for later crystallization (hope to see NaCl cubes).
- Distribute small amounts of vinegar in now-empty shotglasses; have them test chalk, various rocks, shells, finally their precipitates.
- Last but not least—CLEANUP TIME!!
If still time left, take out bottle of seltzer; get class to describe everyday experiences (e.g. no bubbles visible till opening, opening after dropping, going flat...). Gasses dissolve, too! What gas is in soda? HINT: same as in our experiment—we made "salty chalk soda!"
If microscope available, set up, pass around artemia egg samples for examination, then put under microscope to show how much magnification the microscope provides; do the same for for NaCl crystals (use brand of salt with good crystals! cheap generic is usually fine).
![]()